This document describes the process in the outdate version 1.0.
1. Export from DAZ Studio
In DAZ Studio, add a character and give her hair and some clothes. Also shape the character to the desired shape.
The pictures above shows our character with clothes before and after she has been shaped.
Save
the character as a DSON User File (*.duf), which is DAZ Studio's
internal format. We will call here Ana , so we choose the file name
Ana.duf. It may also be a good idea to rename the character in DAZ
Studio.
The .duf file contains information about the
character shape in the form
of morphs. However, I have not understood how DAZ Studio fits clothes,
although it must be possible to do so. As a work-around we have to
export the character, either as a Wavefront object file (*.obj), or as a
Collada file (*.dae). It is usually sufficient to choose one of them,
but the DAZ exporters are not perfect and sometimes one or both of them
fail to export the proper information.

To
export Ana as a Wavefront obj file, select File > Export and choose
Wavefront object (*.obj). The file must be exported to the same
directory as ana.duf was saved and have the same name. We therefore
choose the filename ana.obj and press Save. A window with export options
appear. Press Show Individual Settings and disable some checkboxes. It
is important that Remove Unused Vertices is unchecked, otherwise the
settings are not so important (I think). Unchecking options gives a
smaller obj file and is preferred unless you want to use the obj file
for other purposes as well.
To
export Ana as a Collada file is completely analogous. Select File >
Export and choose COLLADA (*.dae). Export the file to the same directory
as ana.duf and call it ana.dae. Show Individual Settings and make sure
that Remove unused vertices, Ignore invisible nodes, and Merge Skeletons
are disabled, and that Bake scale is enabled.
2. Import into Blender
After the import-daz add-on has been
enabled, we can import the duf file into Blender. There are two ways to
invoke the DAZ importer; either press the Import File button at the top
of the Setup menu in the DAZ Runtime tab, or go to File > Import >
DAZ Native (.duf, .dsf). Since we almost always need to do further work
on the character in the Setup panel after it has been imported, I
prefer to use the button.
A
file selector window appears. Navigate to the file ana.duf which we
saved in DAZ Studio, select it and press Import File. But before
importing, consider the settings to the left.

- Scale: Factor to scale locations in the DAZ file, default
0.1. DAZ uses centimeters, so the scale 0.1 corresponds to decimeters,
which make a typical character fit nicely in the Blender viewport.
- Z Up: Convert from the DAZ convention (Y axis points up) to Blender's convention (Z axis points up). This is enabled by default.
- Rename: Rename objects based on the file name.
- Create Groups: Create a group named after the file name, and add all imported objects to it. This is primarily useful for file linking,.
- Clothes Fitting: Method used for fitting clothes to the character.
- None: No clothes fitting. All shaping of the character is ignored.
- Obj File: Fit the character and clothes using the Wavefront .obj file that was exported from DAZ Studio.
- Dae File: Fit the character and clothes using the Collada .dae file that was exported from DAZ Studio.
- Color Choice: The color assigned to different materials. This
only affects materials where the diffuse color is controlled by a
texture, so only the viewport appearance is changed, not rendered
images.
- White: Use the colors defined in the DAZ file, almost always white.
- Random: Assign random colors to materials, to easily see which faces are assigned to which material.
- Guess: Guess a color depending on the material name. If the
material describes skin (the material name contain words like arm, leg,
face, torso or head) it is given the Skin Color defined below, otherwise
it receives the Clothes Color.
- Guess, Random: Skin materials receive the Skin Color, whereas other materials are assigned a random color.
- Skin Color: The color assigned to skin materials.
- Clothes Color: The color assigned to other materials.
- Verbosity: Controls the amount of information printed in the
terminal window. The default is 1, higher values may be useful for
debugging.

Here
are three versions of Ana, imported with different settings of Clothes
Fitting and Color Choice. We notice that when there is not clothes
fitting, Ana is shorter and less buxom, because the shaping we did in
DAZ Studio has been ignored. Fitting the character to the exported .obj
and .dae files work equally well in this case.
We need to fix a number of problems before we can start to pose Ana.
This is done in the Setup panel below the Import File button. The Setup
panel is arranged in chronological order. You don't have to carry out
the tasks in exactly this order, but some steps are destructive and make
it impossible to go back.
Each
piece of clothing is equipped with its own armature. Normally we want
to join all armatures which control both the character and all clothes.
There is a button for doing this, but some armatures require special
attention.
We see the rigs in the outliner. The
character rig is simply called Ana (the name was taken from the .duf
file), and the clothes rig are parented under it. Select all the clothes
rigs, except for the arm armor and the boots, and then shift-select Ana
to make it active. Set Extra Bones to Ignore and press Merge Rigs.
The
clothes rigs disappear and the clothes meshes are now parented directly
under the character rig. The armature modifier have also been changed
to the character rig moves the clothes as well.
The
armor has an extra bone to move the cape. We want this bone to be added
to the character rig. To this end, we change the value of Extra Bones to
Merge and press Merge. Whereas the original character bones are located
on armature layer 1, the new bone appears on layer 2, but this could be
changed with the value of Extra Layer.
The
boots with high heels pose new challenges. We see that the feet are not
inside the boots, as they should. To fix this, select the boots and
shift-select the character (the armatures, not the meshes), and press
Copy Poses.
The
feet are now inside the feet. With the character selected, press Apply
Rest Poses to make this the new rest pose for the feet.
It
sometimes happens that the feet mesh is inside high-heeled shoes but
the foot bones are outside. In that case we can often use Copy Bones
rather than copy poses. Copy Bones changes the bone locations in Edit
mode, without moving the mesh.
The
toe bones are not very useful when the feet are covered by shoes, and
usually not when the feet are bare either. To replace the individual toe
bones with a single bone, press Merge Toes.
Finally,
the character and boots rigs match and can be joined. Select the boots
and shift-select the character, press Merge Rigs with Extra Bones set to
either Ignore or Merge.
We
want to change the viewport color of the boots assigned by the
importer. Select the boots mesh (the rig is gone since the previous
step). In the Colors section, change New Color to something black and
press Change Colors. The boots are now black in the viewport.
One
can of course edit the material colors directly in the material
context. However, DAZ meshes often have several materials, and changing
the diffuse color many times is tedious. The button in the Setup panel
changes all materials of a given mesh at once.
Let us try to give Ana some green lizard skin. Select Ana_Mesh , change New Color to bright green, and press Change Skin Colors.
Ana
now turns green, but eyes, lips and eyelashes are not affected. Note
that this action changed the diffuse colors of more than ten skin
materials at once, something that would have been quite tedious to do
directly in the material editor. If we had pressed the Change Colors
button rather than Change Skin Colors, all of Ana would have turned
green, including eyes and lips.
The
diffuse color only affects the appearance in the viewport. When we
render the colors are controlled by textures, which are not affected.
Materials that do not have diffuse color textures are ignored by the
Change (Skin) Color buttons, so the rendered image is never changed.
Well,
we decide that Ana looks better with skin-colored skin, so undo the
last few steps until the skin color is back to normal. The next step is
to make a low-poly version of the character, which used to be called
proxy mesh in MakeHuman. The low-poly mesh can have several uses, e.g.
to speed up posing speed. The idea is to hide all the original meshes
while posing for maximum speed, and then hide the low-poly mesh and
unhide the original meshes when rendering.
The low-poly
code uses Blender's decimation modifier, set to Unsubsurface.
Iterations is the number of iterations in the modifier, and Layer is the
layer on which the low-poly mesh is placed. By default Iterations is 2,
which yields a mesh where the typical mesh spacing is twice as large.
It general it is desirable to use an even number of iterations, because
if Iterations is odd the faces will be rotated ninety degrees.
Press
the button Make Low-poly Version. A low-poly mesh is created and placed
on the specified layer. It has the same parent and armature modifier as
the original mesh. It also uses the same materials, so it looks the
same when rendered, with an important difference described below.
Here
is a comparison of the original and low-poly meshes. Ideally the number
of faces should be reduced by a factor four, but in practice this goal
is not reached because some faces are triangulated. Increasing the
number of iterations will reduce the face count further, but it will
become increasingly less efficient because more and more quad faces are
lost to triangles.
The
making of low-poly meshes is not restricted to the character herself.
Select all clothes meshes in the outliner and press Make Low-poly
Version to create low-poly versions of these meshes. This time we set
Iterations to four, because these clothes are quite densely meshed, and
Layer to five.
The
low-poly character with low-poly clothes looks like this. The names of
the low-poly versions end with "_lodn", where n is the number of
iterations.
We
can now pose the low-poly version with high performance. When the pose
is perfected, we switch to the layers where the original meshes are
located, and render.
Here
is a comparison between renders of the original and low-poly meshes.
The low-poly versions could be usable as they are in real-time
applications, were it not for an unfortunate misfeature in the
decimation modifier: it does not respect UV boundaries. If we hide the
clothes and only render the low-poly character, we see that skin looks
ok except for some ugly white stripes. This happens when a seam in the
original mesh crosses in the middle of some faces in the decimated mesh.
Half of the face's corners then belongs to one UV island and the rest
to another, and the face is stretched over random parts of the texture.
Let
us hope that the Blender developers fix the decimation modifier so it
respects UV seams. Until that happens, texturing the low-poly meshes
must be done by hand.
The
next step is to add some standard morphs, so we can pose the face.
Select the rig or the character, and press Load Face Units, Load
Expressions, and Load Visemes to automatically load the standard morphs
provided by DAZ. Of course, you don't need to load all types of morphs;
if know that your character will only display overall expressions, but
she will never talk nor need to display finer emotions, only Load
Expressions and ignore the other buttons.
Ana is a
Genesis 3 character, where facial posing is done with a face rig, so
what we referred to as "Morphs" are actually facial rig poses. In
contrast, in Genesis and Genesis 2 characters, facial posing is
implemented with real morphs, which translate into shapekeys in Blender.
In that case it is important that all morphs are loaded before the
character mesh is edited, e.g. by pressing the Merge Anatomy button
below. Real morphing relies on vertex numbers, so they must note be
changed before the shapekeys are created.
Three
new panels now appear at the bottom of the DAZ Runtime tab when the rig
is selected. In the Face Units panel we can set the values of the
individual face units. The Pin button to the right set the value of the
morph to one and zeros all other face units morphs; morphs in other
categories, such as expressions and visemes, are not affected. The Clear
Units button zeros all face unit morphs.
The
DAZ importer knows about the Automatic Keyframe Insert button (the red
dot at the timeline). If this button is active, keyframes are
automatically inserted when any property in this panel is changed.
The
Expression panel works analogously. Genesis 3 only comes with a small
set of basic expressions, but Genesis and Genesis 2 have much more.
Finally,
the Visemes panel allows you to do lipsync. The Load Moho button
imports a moho (.dat) file which contains a lip sync animation. A free
tool that generates moho files is Papagayo, which can be downloaded from
lostmarble.com.
If
the rig is selected, the DAZ importer will automatically attempt to
load morphs to the associated character mesh. However, we can load
morphs to any mesh, provided that the vertex count matches the morph
file. Select the arm armor and press the Import Morph(s) button.
In
the file selector, navigate to the place where morphs for the arm armor
is located (this should be in one of the DAZ libraries), select a .duf
or .dsf file, and press Import Morph(s). The import options to the right
are
- Load All: Load the morphs from all DAZ Studio files in the
present directory. The "morph" is either a proper morph, corresponding
to a shapekey in Blender, or a pose for the rig.
- Use Drivers: Drive the value of the morph with an object
property of the parent rig. This property is displayed in the Custom
Morphs panel when the rig is selected.
- Category: This is used to group related morphs together.
In this case, we disable Load All and enable Use Drivers, and
set the category to Armor since it will affect the armor rather than Ana
herself.
A
new panel called Custom Morphs appears at the bottom of the DAZ Runtime
tab when the armature is selected. It currently only contains the
single category Armor with the single property JCMLSD. The illustration
above shows the effect of setting this property to zero and one.
Press
Import Morph(s) again with the arm armor selected, but this time enable
Load All in the import options. All morphs in the given directory are
loaded, and appear in the Custom Morphs panel.
Cleary
the Custom Morphs panel can become quite cluttered with many morphs.
Therefore we can hide entire categories by disable the corresponding
checkboxes, which makes it easier to work with the unhidden morphs.
The
morphs correspond to shapekeys in the mesh. If the Use Drivers option
was enabled when the morphs were imported, as was the case here, the
shapekey values are driven by rig properties. One advantage of this is
that the morphs work with file linking; if the character is linked into
another file and the rig is proxified, the morph values can be animated
in the scene file.
If you have not already done so, now is the time to save the Blender file, because it must be saved before the next step.
So
far all textures are located in their original locations in the DAZ
libraries. If you intend to paint on the textures, or move the Blender
file to a computer where DAZ Studio is not installed (or all used assets
are not installed), you need local copies of the textures. Press Save
Local Textures to do so. This command creates a folder called "textures"
in the same directory as the blend file, and copies all used textures
there. The absolute file links to the textures are also replaced by
relative ones, so the textures will be found even if the blend file and
the textures folder are moved elsewhere.
Here is the folder with the textures used by Ana.
Parts of the skin is covered by clothes, but the character mesh is still
there right below. This may be a problem because the skin may poke
through the clothes in some places. The simplest solution is simply to
delete the hidden vertices. This is also the best option if you know that the
character will always be dressed in the same way, because removing vertices will increase performance. However, if Ana will
take off some of her clothes at some stage, it will look strange if no
body is there.
Another
solution is to use mask modifiers, and the DAZ importer provides some
support to facilitate this. Select the mesh that will be covered by
clothes, normally the character itself, and press Create Masks And
Modifiers.
A
mask modifier is created for each piece of clothing (for each child of
the character's parent rig). The modifier uses a vertex group called
"Mask_" + clothing name, and the corresponding empty vertex groups is
also created.
A few DAZ assets are able to create the
vertex groups automatically; this is the case if the corresponding .dsf
file contains a "graft" structure. In particular, separate anatomy often
has this property. If the vertex groups are already created during
import, we could have pressed Create Mask Modifiers to create modifiers
using the existing vertex groups.
So
far the mask modifiers don't hide anything because the mask vertex
groups are empty. In edit mode, select the vertices that should be
hidden by the boots, and assign these vertices to the Mask_Boots vertex
groups. When we toggle back into object mode, the skin under the boots
is now invisible.
Repeat
the procedure for the clothes that cover a significant part of the
body, in this case the corset and the pants. Delete the superfluous mask
modifiers and vertex groups. If we hide the clothes in object mode, we
see the holes in Ana's body.
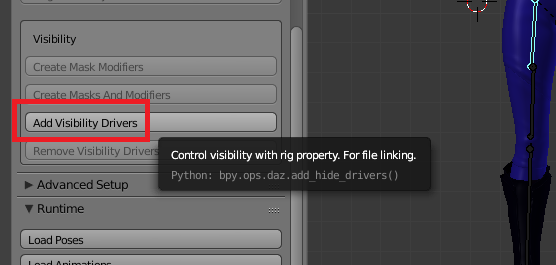
Select
the armature and press Add Visibility Drivers. Before doing this step,
all low-poly meshes were deleted except for Ana_Lod2.
The
Visibility panel appears at the bottom of the DAZ Runtime tab when the
rig is selected. There is an entry for each mesh where its visibility
can be toggled on and off. In the outliner you can see that the meshes'
visibility in the viewport and in render are now driven, and the
corresponding controls are purple. The mask modifiers are also
controlled by these rig properties, so hiding a piece of clothing turns
off the corresponding mask modifier.
Turn
off the visibility of all meshes except for Ana_Lod2. We can now pose
the character with moderate overhead. When it is time to render, the
low-poly mesh can be switched off and all the high-poly meshes switched
on. This procedure on works with file linking, because visibility is
controlled by rig properties.